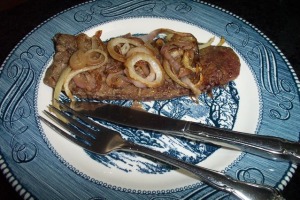
Beef Liver with Onions Recipe

Beef Liver with Onions

When I mention cooked liver, what do you think of? A rubbery piece of meat with a metallic iron taste and grainy mouthfeel? Or maybe foie gras and sweetbreads? My mom use to make awesome chopped chicken liver sandwiches when I was growing up. Yum. My brothers and I still talk about it to this day. She would sauté chicken liver in a cast iron skillet with mushrooms and onions and serve it up on a bed of sticky white rice, Mom Foxman style. Any extra liver would go into a bowl with some sliced hard boiled eggs and a little mayonnaise. With the side of a fork, she would mash and mix the ingredients together. Spread in between two pieces of bread and, voila, a chopped chicken liver sandwich. At lunchtime, friends would ask to feel how heavy my sandwich was. Mom didn’t skimp. I have such fond memories of eating those sandwiches and always associate good home-cooked meals with my mom. As a matter of fact, I just got off the phone with her, and she suggested adding some raw chopped yellow onion to the liver mixture. Thanks, Mom.

In America most organ meats are seen as throw-away or scrap pieces. While in many other places of the world, people eat the entire animal. Nothing is left to waste. We often associate the “need” to eat things like tripe, liver and heart with developing countries or perhaps in many of our families’ pasts when people did not have much money and had to “make do” with what they had. Nowadays many high end restaurants romanticize these peasant foods (perhaps the foods of their grandparents and great-grandparents) by cooking with unpopular animal parts . . . and charging a fortune.

When I told my oldest son that I was cooking up liver, he responded by saying “Ick”. I then asked him if he knew what liver was. He said “No”. I told him where the liver was in the body and reminded him what chicken breast, ground beef and tilapia filets were. . . the bodies of animals. Then he said “Oh”.

How was I going to prepare the beef liver? I checked a few recipes online and found a few ideas. The first thing I did was to rinse the meat and then put it in a casserole dish. I then covered the liver with milk and let it soak for an hour.

Soaking beef liver in milk
This is suppose to help lessen the bitter taste. You will notice blood coming out of the liver. While the liver was “marinating”, I heated up my favorite seasoned cast iron skillet. Once hot, I added a tablespoon of olive oil and some sliced yellow and red onions.
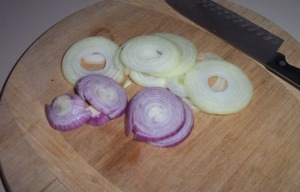
Sliced yellow and red onions
Remember that a hot pan with room temperature oil will help the food not to stick. I added a dash of salt and pepper and cooked the onions until soft. I like onions with some texture and didn’t want them to breakdown too far and caramelize. Be sure to stir frequently to prevent burning. I removed the onions from the heat and set aside for later.

Next I dried the liver pieces. In a shallow dish, I added 1/2 cup of all purpose flour with a 1/8 teaspoon of salt and pepper. I gently coated the meat in the flour and set them in the hot skillet with another tablespoon of oil. Depending on the thickness of the liver, cook about 3 to 4 minutes on each side. Just like a fine steak, let the meat cook and don’t disturb it by moving it around or poking it. Also do not overcook the liver or it will be chewy and rubbery. In the last minute of cooking, return the cooked onions to the skillet. Just remember that when you take the meat off the heat, it is still cooking. So if you try to cook the meat until it “looks” done, chances are that it will be overcooked by the time you plate it up and eat it. There’s one more slice of liver left in the fridge. I know what I’m having for lunch. Enjoy!

Beef Liver with Onions Recipe2015-02-19T08:18:10-06:00

Free Range Eggs For Sale!!

Assorted Eggs: 1 dozen

This past spring, we picked up eight more chickens. They started laying in October and have been very consistent. Our hens have a diet of poultry layer feed, scratch (corn and wheat berries) and kitchen scraps like apple cores, celery, kale ribs and carrots. When weather permits, they have supervised free ranging (sounds like setting up a playdate for my kids). That means they eat bugs, worms and insects on our property where we use NO pesticides or insecticides.

We feel it’s important to treat them well and give them a good life. They’re providing food for us, so we should take good care of them, right? We handle our chickens daily. Not only is it relaxing and reassuring to them, but it is somewhat therapeutic for us as well.

Our chickens are not stuck in a tiny cage all day. As a matter of fact, they live in a large coop that can be best described as a split-level condo development. Heather and I built it to include cozy nesting boxes and several perches. Heather recently installed plexi-glass so they can enjoy morning daylight (we also have a light set on a timer during the winter months). Under the coop, there is an enclosed area if they want to get outside but still feel protected from the elements. A 3-gallon waterer sits on a heater to keep their water from freezing. Last but not least, their coop is surrounded by a fenced in enclosure, which includes deer netting across the top to prevent swooping hawks or climbing critters.

As you can see in the pic, we have a variety of egg colors. If you’re wondering, YES, these eggs taste better than the regular ones from the store. The yolks are darker and richer tasting, which reflects their diet. These are not 100% certified organic, but we’re pretty close. Give me a call or email if you’re interested.

1 dozen = $4.50. 1/2 dozen = $2.25.
Pick up only.

Free Range Eggs For Sale!!2015-01-27T09:00:15-06:00

Baigan Pachchadi (Spiced Eggplant with Yogurt)

Spiced Eggplant with Yogurt

The topic of Indian food came up with three of my clients the other day when I asked what they were planning for dinner. I find that people, like myself, crave foods with spice when it’s cold outside. Even though we’ve had a couple weeks of milder weather, the temps are dropping back down and the clouds are still blanketing the sky. Indian and Pakistani foods can definitely warm the bones.

After two eggplants magically found their way into my refrigerator, my wife also suggested Indian food. So I went to my favorite cookbook, The Complete Asian Cookbook by Charmaine Solomon. On page 86, there is a recipe called Baigan Pachchadi (Spiced Eggplant with Yogurt). Now remember, “spiced” does not necessarily mean “spicy”. It’s more about flavor. And how spicy something tastes really depends on your pallet. I’m more of a medium heat kinda guy. This dish has mustard seeds, garam masala, fresh cilantro and a little chili powder.

I was also excited to prepare this dish after a discussion with a client about reducing meat-intake and increasing veggies. I will be sure to pass this recipe on to her. Did you know that eggplant is a common meat substitute? It has excellent chewiness and flavor.

Total prep time (including washing, peeling, measuring, cutting and cooking) for Baigan Pachchadi is 30-40 minutes. Makes for a wonderful side dish and can easily stand on its own. Enjoy!

Ingredients
2-3 tablespoons oil (I used a combo of olive and grape seed)
1 teaspoon mustard seeds
1 medium onion, finely chopped
2 fresh green chilies, seeded and sliced (I used canned mild green chilies)
1 medium eggplant, peeled and diced
1 small ripe tomato, diced (I sliced a handful of organic grape tomatoes)
1/2 teaspoon salt
1 teaspoon garam masala
1/2 teaspoon chili powder
1/4 cup water
1 cup yogurt
2 tablespoons chopped fresh coriander leaves (cilantro)

Directions
In a saucepan, heat oil and fry mustard seeds until they pop. Add onion and chillies and fry until onion is soft. Add eggplant and fry for a few minutes, stirring, then add tomato, salt, garam masala and chili powder. Stir well, add water, cover and *cook until eggplant and tomato can be mashed to a puree. Cool, stir in yogurt and half the coriander leaves (fresh cilantro). Serve garnished with remaining leaves. Serves 4-6.

*I like the veggies to have some chew left so I did not cook the eggplant and tomato until it was totally broken down.

Baigan Pachchadi (Spiced Eggplant with Yogurt)2014-12-17T13:59:09-06:00

How to Make Seasoned Kale Chips

Last week I picked some kale from our vegetable garden. When I went back inside I realized that I had never cooked with kale before. What was I going to prepare? My wife suggested a kale chip recipe that she had recently been given by a friend. Problem solved.

I started by preheating the oven to 275 degrees F. I rinsed several kale leaves, patted them dry and removed the ribs. Then I cut the leaves into 2 inch pieces. Next I added them to a large bowl and drizzled some olive oil (1-2 tbsp) on top. I mixed the greens thoroughly so they were well coated. Finally I lay the kale on a baking sheet and sprinkled them with sea salt. The kale was baked for approximately 15 minutes and ready to serve.

Depending on your oven, you may need to vary the cooking time and temperature. For a little heat, you can sprinkle cayenne powder or red pepper flakes. The boys really enjoyed them, and I knew they were a hit when my youngest ate a small bowl full of kale chips. When he was done, he reached up to the counter for more and said “Chips.” Enjoy!

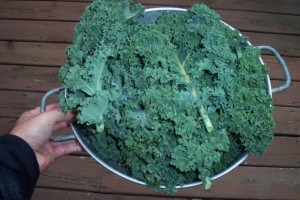
Kale from the garden
Freshly picked kale. If you plant kale late in the summer,
you can harvest it from fall until the ground freezes in winter.

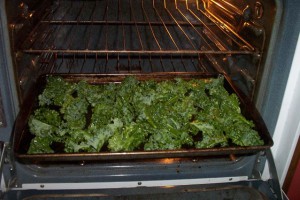
Kale in the oven
Kale is ready for the oven.

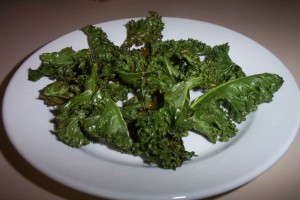
Kale chips
Voila! Kale chips are ready to eat.

How to Make Seasoned Kale Chips2014-11-19T13:38:42-06:00

Shrimp Pancit Recipe, Mrs. Foxman Style

One of the things I aspire to is to cook like my mom. I have such fond memories of watching and helping my mom prepare meals in her kitchen. As I grew up, I became aware of how good her cooking truly was when my friends continued to ask to come over for dinner. Mom always had something simmering on the stovetop or baking in the oven. Nothing has changed. When I go home to visit, she is often in the kitchen (her domain), chopping, mixing, and stirring.

One of my absolute favorite dishes is her pancit recipe. She learned it from her father, who was born in Luzon, the largest island in the Philippines. Like all great chefs, she personalized the dish by adding her own personality. The dish is unbelievably simple and that is why I like it so much. Not a lot of competing or over-powering flavors. If you have never had pancit before, it can best be described as a Filipino chow mein or lo mein. Most pancit recipes that I have seen do not include garlic, and when I asked my mom why she added garlic to the dish, she just looked at me and said because she did. That’s chutzpah in cooking. I love it! Enjoy!

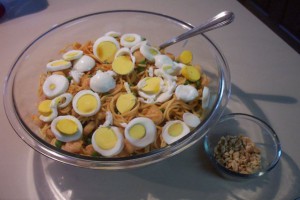
Shrimp Pancit

Ingredients
1 lb dry thin spaghetti
1.5 lbs shrimp (deveined with tail off)
2-3 tbsp peanut oil
3-4 cloves garlic, diced
1 yellow onion, chopped
1 tbsp lemon juice (or lemon wedges)
1/2 tsp salt
1 tsp paprika
1 cup frozen peas (this is not in Mom’s original recipe)

Optional Garnishes
2-3 green onions, chopped
3-4 eggs, hard boiled and sliced
1/2 cup peanuts crushed, roasted and unsalted
1/2 cup bean sprouts
1/4 cup brown sugar

* Note: Mom’s original recipe called for 1.5 pounds of sliced boneless pork shoulder. I did not intentionally leave it out. I just didn’t have it in my freezer or fridge. So I made an adjustment.

Directions
1. Fill a 4-quart pot with water and set heat on high. Add a teaspoon of salt. Once the water is boiling, add the spaghetti. Be sure to stir noodles occasionally so they cook evenly and don’t stick to the pot or to each other. Cooking time is approximately 9-10 minutes. When done, strain noodles in a colander and run cold water on top. This will stop the cooking process. Otherwise, the pasta will continue to cook and get overdone.
2. Because I don’t like washing more dishes than I have to, I rinse and reuse the same pot. Place the pot on the stovetop, add peanut oil and heat on medium/high. Then add the onions and garlic. Stir continuously for two minutes.
3. Add the shrimp. Be sure to stir so they cook evenly. Once you see their gray color start turning pink (a sign that they are done), add the drained spaghetti back into the pot. (If you cook the shrimp longer, they will be overdone and feel rubbery.) Add paprika and mix thoroughly so the paprika coats the noodles and shrimp. Then add peas and reduce heat to low.

Serves 6.

Condiments can greatly affect this dish. Personally, I enjoy pancit with slices of boiled egg and crushed peanuts. Raw green onions add a nice kick to it. If you like green onions, just not raw, add them to the pot in step 3. For a milder flavor, scallions are a nice substitute. A sprinkle of brown sugar adds sweetness and nicely balances the green onions. Beans sprouts add a light and fresh crunch. Try a few garnish variations and let me know which is your favorite.

Shrimp Pancit Recipe, Mrs. Foxman Style2014-11-05T09:16:01-06:00

Bulgur Supper Salad

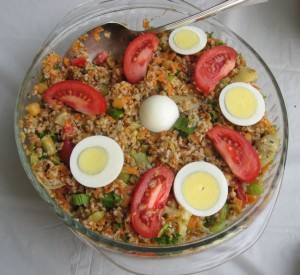
Saturday’s Client Appreciation Day was a big success! To express my thanks for their business and support, I invited clients to my home to enjoy a few homemade dishes, exotic cheeses, local beverages and fantastic weather. The bulgur salad recipe that my friend, Amy, emailed me was a hit. High in fiber & protein and full of flavor, this is a dish you can make for the whole family or bring to your next party. Enjoy!

Bulgar Salad

Ingredients for Salad
2 cups water
3/4 tsp salt
1 cup bulgur
6 oz jar marinated artichoke hearts (save marinade for dressing)
1 large carrot, shredded
2 stalks celery, thinly sliced
2 green onions, thinly sliced
1/2 cup parsley, chopped
1 hard boiled egg, sliced
2 medium tomatoes, sliced
1 cup chickpeas – aka garbanzo beans
1/4 cup green olives

Dressing
4 tbsp salad oil (we used olive oil)
4 tbsp lemon juice
1 tsp dried oregano
1 tsp dried basil
1/2 tsp black pepper
1 garlic clove, pressed or minced
1 tbsp Dijon mustard
marinade from artichoke hearts (approx. 4 tbsp)

Directions
In large pan, bring water and salt to boil. Stir in bulgur. Reduce heat, cover and simmer 15 minutes. Dice artichokes; set aside. To prepare dressing, combine all ingredients. Turn cooked bulgur into a bowl, add dressing and stir gently. Let stand until cool. Stir in artichokes, carrots, celery, olives, chickpeas, onions and parsley. Cover and refrigerate 2 hours or until next day. Garnish with eggs and tomatoes.

Bulgur Supper Salad2014-05-27T08:29:23-05:00

South of the Border Cooking Class

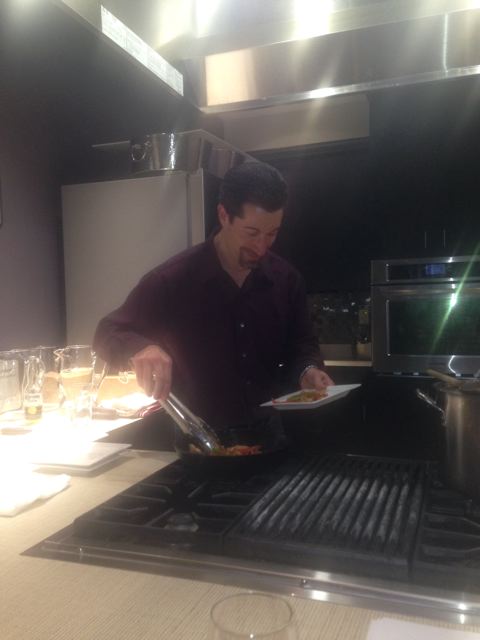
On Wednesday 25th I held my first cooking class at Fresh Madison Market. The 2-hour class was titled Cooking South of the Border, and I prepared some of my favorite Tex-Mex cuisine: Sizzlin’ Chicken Fajitas (in a cast iron skillet just like the restaurants), Heather’s Homemade Guacamole (a real crowd pleaser), Chili con Carne (adapted from my mom’s recipe — it’s great for a large group or put into containers and make your own frozen entrees) and a Crisp Taco Salad (say goodbye to iceberg lettuce). The goal was to create meals that were familiar, simple, delicious and healthy. In addition to sampling each dish, everyone enjoyed a Corona Extra or glass of Sangria. I also covered different cutting techniques like how to peel and dice garlic, how to core and chop bell peppers and how to slice an onion without crying.

What I enjoyed most was that everyone had a good time, asked great questions and were interested in learning more. So what’s next on the list? People who attended my class said they were interested in Thai cuisine. Pad thai, curries, satays. Yum. If you are interested in having me put on a cooking class for you and your friends, please give me a call.

South of the Border Cooking Class
Chopping a green bell pepper and sharing a story.

South of the Border 2
Getting ingredients ready for chili con carne.

South of the Border 3
Plating up some sizzlin’ chicken fajitas.

South of the Border Cooking Class2014-03-28T11:26:37-05:00

Chicken Enchilada Soup

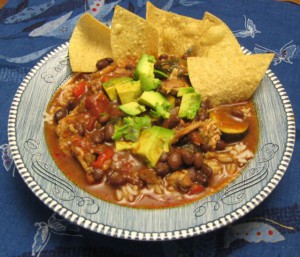
After my son, Roy, was born last March, our friend, Natalie, brought over a homemade dinner. Heather and I had prepared and frozen several meals ahead of time, but I can’t tell you how much we appreciated the extra help from our friends. The chicken enchilada soup was delicious, flavorful and hearty . . . perfect for a Wisconsin winter. Since then we have made it at least once a month. It’s so easy. Prep time is less than 15 minutes. Then you just pop the ingredients in the crock pot, turn it on and you’re good-to-go. Thanks again, Natalie!

Chicken Enchilada Soup

Ingredients
2 lbs boneless, skinless chicken breast and thigh meat
1 28oz can organic diced tomatoes, undrained
2 15oz cans “Kuners” already spiced black beans (chili powder and cumin), undrained
1 4oz can green chiles
1 12oz can “mild” enchilada sauce
1 large red bell pepper cut into chunks
4 medium zucchini cut into 1″ pieces

Directions
Place meat into a 4-6 quart crock pot. Cover with tomatoes, black beans, chiles, bell pepper and enchilada sauce. Cook on “low” for 8 hours or “high” for 4 hours. Add the zucchini on top with one hour left of cooking. That will keep them from getting too mushy. When soup is cooked, shred chicken with a fork before serving.

Serve with grated cheese, yogurt, sour cream, avocado slices or fresh cilantro.

Chicken Enchilada Soup2014-02-04T11:15:38-06:00

Vegetarian Split Pea Soup

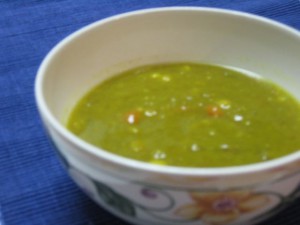
I think about my mom when I cook . . . which is every day. Sometimes I’ll pick up the phone to ask her what she’s preparing for dinner or get some recipe ideas. More than once, we’ve both made split pea soup on the same day. Like mother, like son. Split peas are inexpensive and easy to prepare. Also they are high in fiber, protein, potassium, magnesium and iron. So here’s is Mom’s recipe. Enjoy!

Vegetarian Split Pea Soup

Ingredients
1 cup green split peas, sorted and rinsed
1 cup yellow split peas, sorted and rinsed
1 1/2 cups carrots, peeled and chopped
1 cup celery, chopped
1 medium yellow onion, diced
3-4 cloves garlic, diced
8 cups water
1 tbsp vegetable base or stock
2 tbsp curry powder
1/2 teaspoon cayenne pepper
salt and pepper to taste
2 tbsp olive oil
1 bay leaf

Directions
Start by sorting the split peas, and compost any “bad” ones you find. Next rinse the “good” split peas with water to clean off any dirt. Split peas don’t have the same gas-producing sugars like some other beans, so you don’t have to pre-soak them.

Heat a large pot over medium heat. Then add olive oil, chopped onions, carrots, celery and garlic. Cook for 5-10 minutes, stirring occasionally until vegetables are tender. Add the green and yellow split peas. Cover with 8 cups water. Add vegetable base then raise heat to high. Bring to boil. Lower heat to simmer and stir in the the curry powder, cayenne pepper, bay leaf and salt and pepper to taste. Cover and let cook for 90 minutes.

Serve as a main dish or with a meal.

Note: There’s no need to puree or smash the peas as they will naturally break down during the cooking process.

Vegetarian Split Pea Soup2014-01-14T08:43:34-06:00

How To Make Homemade Baby Food with Butternut Squash

Our 7 month-old, Roy, was recently introduced to solid foods. We started with organic rice cereal, moved on to whole-grain cereal, then started adding foods like pureed vegetables, fruits and yogurt. Now we simply put what we had for dinner (ie: minestrone soup) in the food processor. As my grandfather would say, “He eats with gusto.” Roy’s two favorites are peas and butternut squash. It’s a good thing that Heather had a plentiful harvest of squash from her veggie garden. Not only is this winter vegetable delicious, it is low calorie and contains no cholesterol or saturated fats. Plus it is high in Vitamin A and Vitamin C (two powerful anti-oxidants), B-complex groups and potassium. Let’s not forget to roast up those seeds. They are a good source of protein, mono-unsaturated fats and fiber.

Ingredients
1 4lb butternut squash
Butternut Squash
Directions
Preheat oven to 350°F. Using a sharp knife, slice squash in half.
Halved squash
Remove seeds (save for roasting) and some of the stringy flesh. Place slices in shallow roasting pan, flesh-side down, with about 1/4 inch water in bottom of pan.
Butternut squash is pan
Roast for approximately 45-60 minutes or until you can easily insert a fork right into the rind of the squash.

Remove squash from oven and let cool for 10-15 minutes. Using a spoon, scoop out flesh from shells and place in food processor or immersion blender. Add water based on desired consistency. Of course, you can also manually blend the squash in a bowl with a spoon or fork. Discard (compost) squash shells.
Butternut squash in blender

Bruce's pureed butternut squash
Total yield from one squash is 15-20 4-ounce jars. A 4-ounce jar of 2nd foods organic baby food will run you between $1 and $1.50 a jar. That’s a savings of $15-$30! All that came from a seed planted in the ground. Remember that each butternut squash plant yields several large squash. If you’d rather buy a 3-4 lb organic butternut squash, that will cost $4-5. . . and you’re still saving a lot of money. Another benefit to making your own baby food is the reduction of waste. No more glass jars, plastic containers or “convenient” pouches.
Feeding Roy butternut squash

Satisfied customer
A satisfied customer.

How To Make Homemade Baby Food with Butternut Squash2013-11-04T09:50:47-06:00
Go to Top