Loading...

How to Cool Down After Your Workout

Welcome to winter, where the days are short and chilly. As a matter of fact, it’s currently 29 degrees F outside with clear skies. Our snow-covered fields and woods make for beautiful scenery. Did you know that January is the coldest month of the year in Wisconsin? It’s when temperatures drop and the lakes freeze. How’s this for a segue? Speaking of “cooling down”, what are you doing to cool down at the end of your workout? More and more, people are understanding and benefiting from cooling down after exercise. And, no, I didn’t forget that warming up is vital too. But I’ll save that for another blog.

So what is the purpose of cooling down and why should you do it? A proper cool down is all about Recovery. When you are fully recovered, you can get back to the gym sooner for another workout. Or for another tennis lesson. Or for another hike. Etc. But if you are stiff, sore, tired and not firing on all cylinders and you try to workout at the gym, you run the risk of injury. Especially if you are pushing yourself. So think Cooling Down = Recovery. In my industry of health and fitness, there has been a focus on reducing inflammation in order to recover quicker in between workout sessions. The thinking is that reduced inflammation will reduce stiffness, pain and delayed onset muscle soreness. The equation now looks like Cooling Down = Reduced Inflammation = Recovery = Improved Performance

The next question is, what should you do to cool down? That all depends on the type(s) of workouts you’re doing, your physical abilities and what your goals are. Your activities might be at the gym (weight lifting, pilates, cardio, etc), on the road (running, walking, cycling), on a court (tennis, basketball, volleyball), field (soccer, lacrosse), pool (swimming, diving, water polo), trail (biking, hiking, running, snow shoeing, cross country skiing), ice rink (hockey, figure skating, curling) or slopes (skiing, snowboarding). And these are just a few off the top of my head.

For simplicity sake, I will talk about strength training at the gym. Of course, there are multiple disciplines and approaches to strength training. Heavy weights versus light weights. Low reps versus high reps. Full body versus individual bodyparts. Volume training. Free weights versus exercise machines. Stretch cords versus body weight exercises. Plyometrics, etc. What did I leave out? Answer: Intensity. Intensity is the key ingredient. I firmly believe that how hard you push yourself during your workout is crucial to how much and what type(s) of cool down you do. If your workout, for example, is at 50% maximum intensity, you may not need to do any cool down. Why? Your heart rate and blood pressure are not elevated, there is little to no lactic acid built up in your muscles and you still have a lot of gas left in your tank. Let me interrupt myself by saying that training at 50% intensity is NOT a waste of time. Over the years, I have been asked if going through the motions of a workout was worth doing if you weren’t grinding molar dust or throwing up. I have always answered YES. Remember it’s all about movement. Strength, flexibility, aerobic fitness, coordination and balance can be achieved in a 30-minute workout or a light weight-lifting session. Your workouts SHOULD NOT and DO NOT need to be at 100% intensity all the time. That’s how you get injured. Just remember that professional athletes have seasons and try to “peak” at the right time. Their goal is to stay injury free until the finals or championships. You have an even harder job since you are training for health and fitness, which is 365 days a year.

Knowing what type(s) of cool down you should do has everything to do with how well you know yourself. What does your body like? What does it respond well to? This takes time, patience and experimentation. Even after 30+ years of working out, I am still figuring things out. Why? My body is changing. It’s not the same machine as it was 20 years ago. I have different goals and interests. I don’t do the same sports. You need to take those things into account. If you are 55, you shouldn’t compare yourself to when you were 25. Granted, you might be in better shape now than you were then, but you understand what I’m trying to say.

Here are 5 cool down strategies to try after your workout:

1. Light Cardio (ie: walking, recumbent bicycle, elliptical). During a high intensity workout, your heart rate and blood pressure are sky rocketing. If you go straight to the locker room or to your car when you’re done, you might get light-headed or dizzy once you sit down. An easy walk on the treadmill gives your body time to slow down and let your muscles relax.

2. Stretch (static, dynamic, PNF, passive, active, assisted). When you have a stiff upper back or tightness in your shoulders blades after sitting for too long, what do you do? Many people turn, twist or roll their heads to loosen up their neck. For their shoulders they might pull one arm across their body or reach behind them. Guess what they are doing? Stretching. It comes naturally and is a great way to cool down after an intense workout. There are many different stretching techniques. My suggestion is to try them all and see what you like. As an aside, when I was in college, I remember guys in my dorm who would work out at the campus gym so they could get “pumped up” to go out to the clubs later that night. The funny things is that the “pump” isn’t sustained for more than a short time after your workout. These same guys would complain about muscle soreness the next day. Perhaps it was that they were lifting heavier than they should or got dehydrated from all of the alcohol they consumed. Either way, they left the gym without stretching and helping their muscles relax.

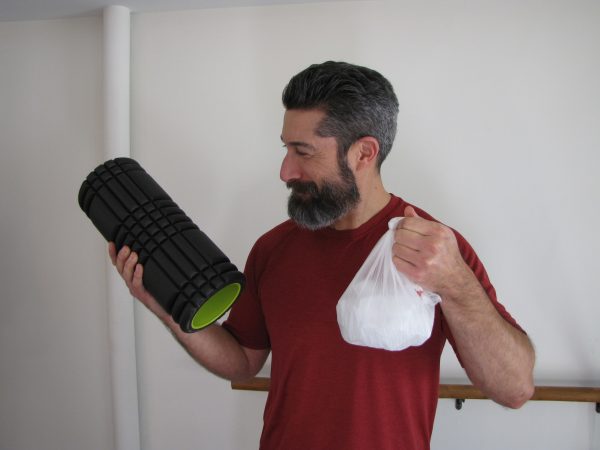
3. Massage Balls, Foam Roller, Massage stick. The first time I heard about a massage ball was from a client who I trained in Redondo Beach, California. I trained Laura in her home once to twice a week for several years. Before one of her workouts, she complained about her low back and said “I’ll be right back. I need to grab my balls.” Wait! What?! A moment later, she left the garage and went inside her home. She came out with two blue racquet balls that were taped together. She set them on the ground and proceeded to lie on them face up so they were positioned on her low back. She moved up and down, letting the balls massage her sacrum and paraspinals. A couple minutes later, she got up and said she felt much better. So unless your massage therapist is waiting for you right when you get done from working out, using massage balls, stick and foam rollers are excellent substitutes.

4. Sauna, Hot Tub, Hot Shower. Not to be a contrarian, but saunas and hot tubs have never felt good to me after working out. I have tried them before and have felt overheated, tired and depleted. And, yes, I was in there for just a few minutes. Some people say they feel their muscles relax and unwind and that it stimulates healing. If that’s your experience, then I say to stick with it. What works for someone may not work for someone else.

5. Ice Bath, Ice Pack or Cold Shower. Cold helps to reduce swelling and inflammation, thereby reducing muscle soreness. I have never sat in an ice bath before but I have used ice packs and taken cold showers. A cold shower feels good to me. It tells my body that I am done working out. Time to slow down, stop sweating, relax. Just be mindful when using ice. 5-10 minutes maximum. Too much time on the skin and ice may cause frostbite.

* Remember, that NO amount of stretching, icing or rolling will prevent injuries and/or improve workout performance IF you are not also getting proper nutrition, hydration, rest and sleep. Always look at the big picture when it comes to health and fitness. It’s not about one specific exercise or one food item or one cool down technique. Take the time to find what works for you and stick with it.

How to Cool Down After Your Workout2019-01-04T13:38:43-06:00

Thanksgiving Turkey Leftover Recipes

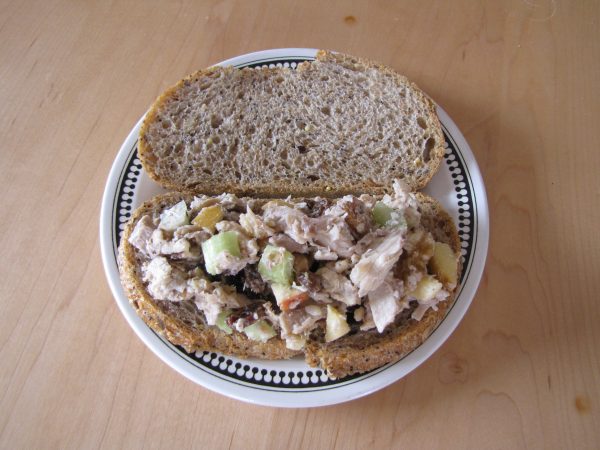
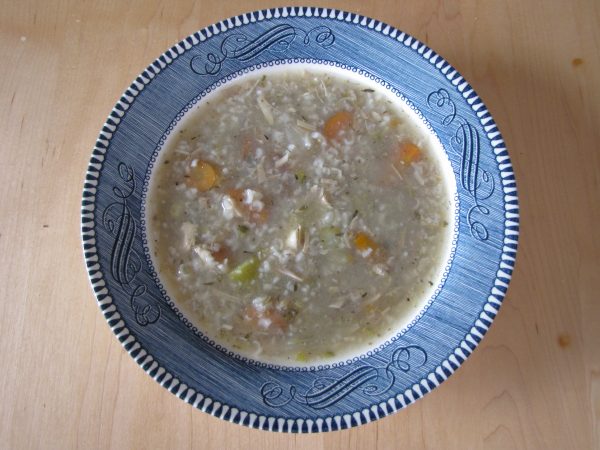
What did you do with your leftover turkey from Thanksgiving? Have a second helping? Freeze it? Or did you say “what leftovers”? This Thanksgiving I already had two leftover turkey dishes in mind: Turkey Salad Sandwiches and Turkey Rice & Vegetable Soup. Both turned out awesome! Why? As in the last few years, I prepared the turkey in a crockpot. A crockpot? Yes. The turkey is easy to prepare, requires no basting, easy to clean up and most of all the meat was moist and delicious. No dry white meat. And in case you are wondering, our crockpot is 8 quarts and snugly fit an 11-pound turkey. That was plenty for our family. Second, the broth/stock that came out of the crockpot was incredible. Better than anything from a can and not as salty. All this talk about food is making me hungry. So here are the two recipes to check out. Enjoy!

Ingredients
8 ounces turkey breast, shredded and chopped
1/2 cup organic raisins
1 organic Gala apple, diced
1 stalk organic celery, diced
1 cup walnuts, crushed
1 tablespoon mayonnaise
1/3 cup plain yogurt
1 tablespoon lemon juice

Directions
In a large bowl, add the turkey, raisins, diced apple, lemon juice and celery. Mix well.

Spread the shelled walnuts evenly on a cutting board. Using a glass, metal or ceramic bowl, crush the walnuts. Be sure to press the bowl down at a slight angle away from you. Why do I crush the walnuts? To make them into smaller bite sizes and to extract a little oil. This will add to the creaminess of the turkey salad.

Next add the walnuts, mayonnaise and yogurt. Mix thoroughly. Why did I add both mayonnaise and yogurt? I ran out of mayonnaise. Plus I feel that yogurt gives it a fresher and brighter taste.

Your turkey salad is ready to enjoy.

Ingredients
16 ounces turkey meat (shredded and chopped)
1 cup rice, dry
3 organic carrots, peeled and chopped
3 stalks organic celery, chopped
1 yellow onion, chopped
2 cloves garlic, diced
5 cups homemade turkey stock
7 cups water
1 tablespoon thyme
1 tablespoon dill weed
1 tablespoon olive oil
salt and pepper to taste

Directions
Place a large pot on the stove top and set heat to medium-high. Add olive oil, onions and garlic. Saute for about 1 minute.

Next add the celery and carrots. Cook for about 5 five minutes, mixing frequently.

Add turkey, spices, stock and water. FYI my stock was super concentrated, very gelatinous and flavorful. So depending on your palette you may want to add more or less water at this point. This will also affect the consistency of the soup.

Bring to boil. Once boiling, add rice, lower heat to simmer and cover with lid. I let it simmer for about 90 minutes. The rice broke down more than I wanted to, but all in all I thought it was a success.

Thanksgiving Turkey Leftover Recipes2018-11-28T09:59:54-06:00

Heather’s Homemade Pizza

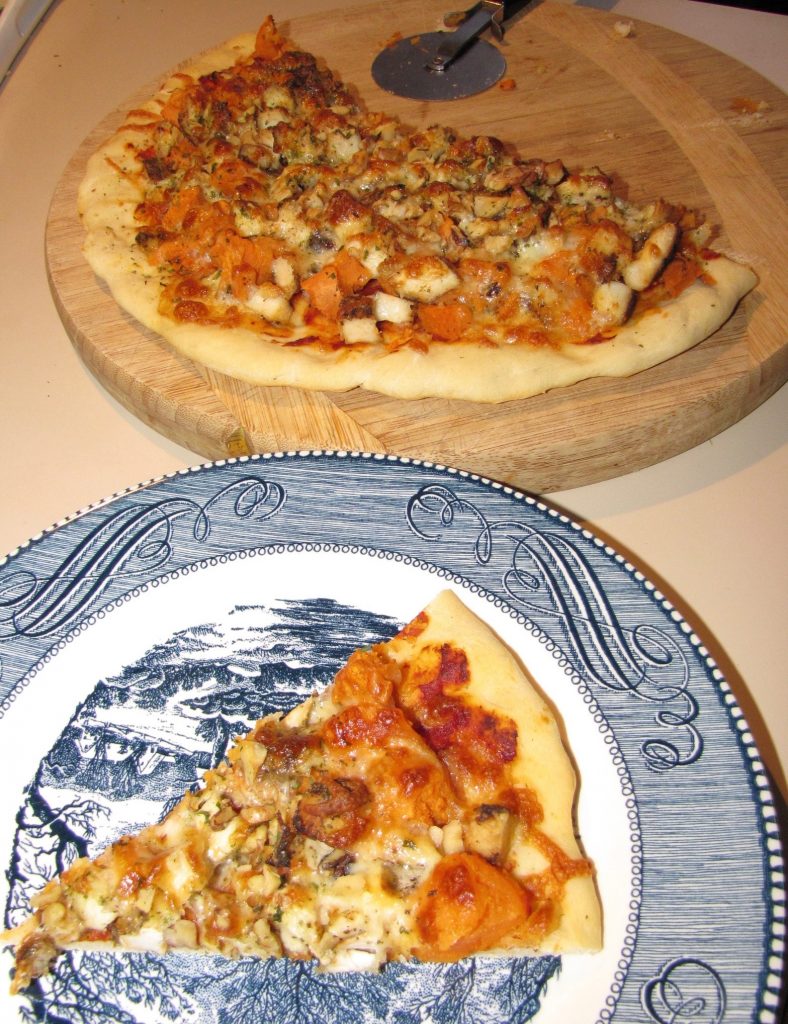
Middleton Co-op’s September/October publication has some great coupons and recipe ideas. Their Autumn Harvest Pizza was a definite winner. This past Sunday, Heather and Bruce rolled up their sleeves, tossed some dough and baked up a nice pizza pie. As always, changes were made to the recipe to suit our palettes and what ingredients were available. And guess what? It turned out great! As a matter of fact, our two older boys, Kyle and Bruce, said it was better than any take-out pizza they had before.

Ingredients
3 cups cubed and peeled sweet potatoes
1 6-ounce boneless, skinless chicken breast, chopped
1 tsp olive oil
1 tsp poultry seasoning
1/2 tsp sage
1 6-ounce can tomato paste
1 tbsp Italian spices (marjoram, oregano, rosemary, thyme, basil and savory)
1 1/2 cups smoked mozzarella cheese (instead of smoked Gouda)
1/4 cup chopped walnuts
1 tbsp dried parsley (instead of 2 tbsp fresh)

Directions
Instead of drizzling olive oil and salt on the cubed sweet potatoes and baking them in an oven, they were microwaved minus the oil and salt. Also the day before, a few chicken breasts were coated with poultry seasoning, sage and olive oil, then baked in the oven at 400 degrees for 40 minutes. After the chicken cooled, one was set aside for the pizza recipe. It was then chopped. What about the other pieces of chicken? One went into my quinoa salad. The other two hadn’t made up their minds yet :-)

The original recipe called for a pre-baked crust. Instead Heather and Bruce followed a pizza crust recipe from Food Network’s Tyler Florence.

Preheat oven to 425 degrees F. Into a small bowl, mix tomato paste and 1 tablespoon of Italian spices. Place pizza crust on a sheet pan and spread tomato paste mixture evenly on the crust. (We did not want it to be dry.) Next top the crust with chopped chicken and cover with mozzarella, walnuts and parsley. Bake for 20 minutes. Just a reminder, every oven is different so be sure to check that the cheese is bubbling and crust is crisp. Slice and ready to serve. Total prep time approximately 1 hour.

Heather’s Homemade Pizza2018-09-20T10:25:29-05:00

How to Do More with Less

How would you like to spend less time working and still get in awesome shape? How would you like to stay active every day and remain injury free? How would you like to eat healthier foods and spend less money than you are right now? Then watch my 14-minute video and learn how to do more and get more with less.

How to Do More with Less2018-09-15T21:30:41-05:00

Buckwheat Soba Noodle Salad Recipe

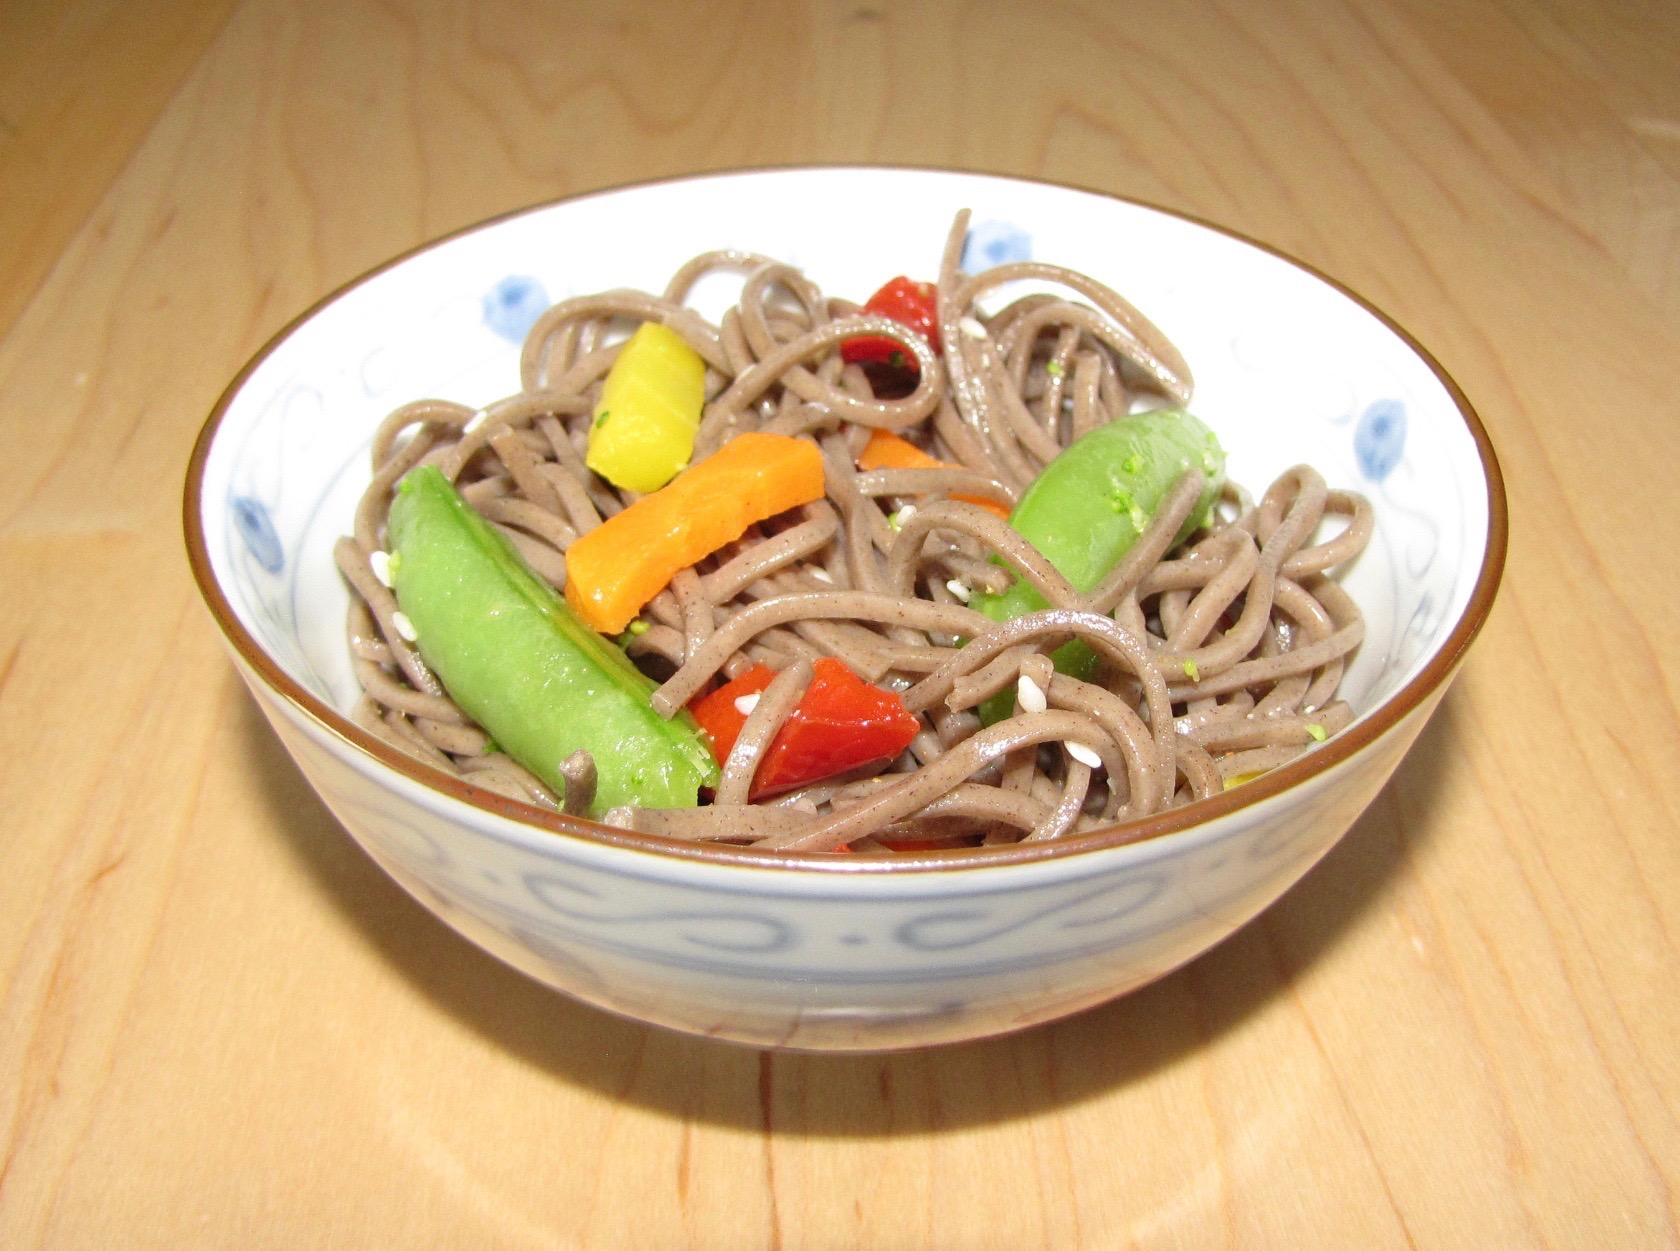
Can you say delicious? This was a spur of the moment creation. I referred to the recipe on the back of the noodle package and also borrowed ideas from a few soba noodle recipes online. As always, I modified the recipe to suit my family’s tastes as well as what ingredients we had in our kitchen. Made for a light and tasty side dish. Enjoy!

Ingredients for dressing

2 tablespoons rice wine vinegar
1/2 teaspoon ginger powder
1 teaspoon honey
1 teaspoon sesame oil
1 tablespoon peanut oil

Ingredients for vegetables and noodles

1 teaspoon peanut oil
1/4 cup red bell pepper, seeded and chopped
1/4 cup mix of yellow and orange carrots, diced
1/4 cup snow peas
1 teaspoon toasted sesame seeds
12 ounces buckwheat noodles

Directions

Heat 4-5 quarts of water in large pot. Once boiling, add noodles and cook according to package directions. I like my noodles to have a little more chew to them, so I cooked them al dente. Noodles were then drained in a strainer and rinsed under cold water.

Heat peanut oil in a saute pan on medium-high heat. Once oil is hot, add the chopped red bell peppers and yellow and orange diced carrots. Stir frequently for 1-2 minutes. Then add snow peas. Continue to stir and cook for approximately one more minute. Remove skillet from heat and plate vegetables to stop cooking process.

In a small bowl mix together the vinegar, ginger powder, honey and sesame oil until combined. Slowly whisk in the peanut oil until the dressing is emulsified.

In a large bowl add the noodles, carrots, peppers and snow peas. Pour sauce over noodles and vegetables and gently mix to combine. Garnish with toasted sesame seeds. Ready to serve and eat.

Buckwheat Soba Noodle Salad Recipe2018-09-13T12:58:50-05:00

Strengthening Your Core with a Twist.

Gone are the days of old fashioned sit ups. They have been replaced with safer, more effective and creative exercises like pelvic tilts, forearm planks, bridges and knee pull-ins. But don’t forget your abdominal rotation exercises. These are crucial in developing a strong core. Do you know how many muscles you use to do a rotation? 1? 2? 3?

Here’s a list of the core muscles used:

Rectus Abdominus
External Obliques
Internal Obliques
Transversus Abdominus
Quadratus Lumborum
Erector Spinae
Splenius
Multifidus

Now add to that all of the upper and lower body muscles you use when picking up a box, for example, and turn to put it on a shelf.

Your core is made up of numerous overlaying and underlaying muscles that go in different directions. Why? So you can do a variety of movements and be protected. To see detailed illustrations of muscle anatomy check out anatomybodydiagram.com.

Here are three of my favorite rotation exercises. Enjoy!


If you don’t have a barbell, try using a broom stick or pole.


If you are uncomfortable lying on the floor, use a mat or lie on your bed.


If you don’t have access to a cable machine, you can use bands or tubing.

Strengthening Your Core with a Twist.2018-09-07T11:33:48-05:00

Back to School

My three boys either ran, sauntered or dragged themselves onto the bus yesterday morning for their first day of school. I’m not sure if I should open a bottle of wine, crank up the radio or just sit and think about what a great summer we’ve had. Yes, I think I’ll do the latter. Reflection is so important. Not trying to relive the past or dwell in the coulda, woulda, shoulda. I’m talking about looking back at a couple or a few months and reviewing accomplishments and experiences.

How often have we heard someone (perhaps ourself) say “Where did my summer go?” or “Wow, summer blew by so fast.” In my opinion, that’s the type of person who didn’t make plans or write things down or track their progress. Granted, stuff happens that’s beyond our control. But I’m talking about setting goals and moving toward them. Yes, there are detours and obstacles along the way, but that’s all part of it.

Why did I title this blog Back to School? Because we need to get back to the basics when it comes to living a healthy and active lifestyle. I’m not talking about hitting the reset button now that your children are back in school and there’s structure again. There should always be structure. But that’s another blog all together.

For me the basics of health and fitness as well as living life are:
1. Having fun
2. Trying stuff
3. Being safe.

A coule days ago I attended a client’s retirement party. At my table a gentleman asked me what I thought was the “number one thing” when it comes to personal training. I answered clearly “Having fun.” He looked surprised and pleased. I went on to explain that, in my opinion, working out and preparing meals should be enjoyed. Because honestly, when we look at life, what is it but a lot of experiences and feelings? Shouldn’t we then have good experiences and good feelings that make us smile? I know that not everything is smile-worthy, but you get my point. At the end of a workout, when you leave the gym, field, studio, court or wherever, if you are not smiling and feeling good about what you did, then you’re doing it wrong. For most of us, the workouts aren’t a sacrifice leading up to the trophy. The workouts are the trophy. And even if you are training for a special event or competition, then what happens when that day is over? When you have crossed the finish line? You’re still you and hopefully you can look back at the work leading up to it and know that the reward was in the trying.

I continued by saying that eating healthy and working out should be about “trying stuff”. Then I smiled and I took a sip from my champagne glass. Not conforming to a workout that will be obsolete in three weeks or following a diet plan that will leave you craving a bowl of ice cream. Tennis, dancing, walking, gardening, lifting weights, swimming, playing soccer are all great activities. But Eric, how am I to excel at one if I am doing a little of all of them. My response? I didn’t know that you were a professional athlete. If so, cross-training is a great way to improve performance in your chosen sport and reduce injuries. How about that? This might tick some people off but going to the gym 3-4 times a week is a waste of time if that’s all you do. How about goofing off in the pool with your kids? Or going for a hike with your spouse? Playing ping pong with your dad? It’s about doing stuff and having fun doing it.

I finished by saying that “being safe” was crucial to adherence and long term success. When it comes to “trying stuff” I’m talking about trying stuff within reason and within your current abilities. If you use to play tennis thirty years ago, and today you decide to hit with a friend on the court, you’re not too bright. You may remember how it felt all those years ago, but if you haven’t been training for it, moving side to side, making quick stops, reaching over your head, then you’re putting yourself at risk. Eric, I’m talking about just hitting. No, I get it. That’s when injuries happen. Several years ago, a client of mine asked if I would play tennis with him. I asked him when he played last and he answered that it had been a few years. I politely declined and suggested he get some tennis shoes and begin by gently hitting balls against the backboard. He was not happy with that answer. Another season went by, he asked and I declined. And another. Finally one day, against my better judgement, I agreed. We started with some groundstrokes. My goal was just to rally and feed the ball back to him in the middle of the court. He got excited and hit the ball firmly to my forehand. I returned it a couple feet to his left. Abruptly he made a quick side step, yelped and then fell onto the ground. Oh shit! He said he felt something pop is his lower leg. He had pulled a calf muscle.

To sum up, going Back to School is not about buying the most expensive piece of exercise equipment or joining the fanciest fitness club or even learning the latest stretching technique. It’s about getting back to the basics: having fun, trying stuff and being safe. Find the activities you like to do and do them.

Back to School2018-09-05T10:56:25-05:00

Deviled Eggs and Brussel Sprouts Recipe

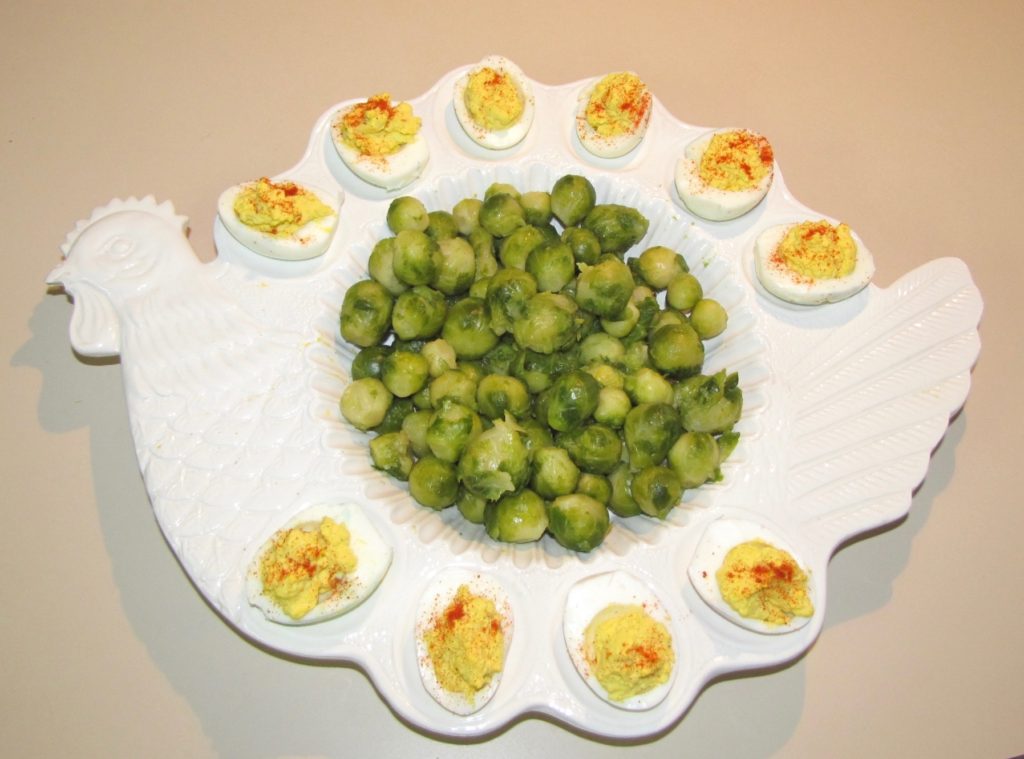
Making food fun, eye-catching and appealing isn’t always about the recipe but about the presentation and the platter on which the food is served. Recently Heather bought a chicken-shaped platter with indentations around the edges and a depression in the middle. With a tiny chip on it, the price was reduced by 80%. A good find. The indentations were intended for deviled eggs (or at least we hoped so), but we weren’t quite sure what food would go in the middle. Crackers, a dip, veggies? Ah, yes! Vegetables. Heather had just gone shopping at Willy Street Co-op and picked up some organic Brussel sprouts. They look like little cabbages and have somewhat of a similar taste. So that’d what she prepared. Deviled eggs and Brussel sprouts. Very simple, healthy and delicious!

So the next time you’re entertaining guests or are invited to a party or just want to make a family dinner more fun, serve up some whimsy with a clever platter or tray.

Ingredients for Deviled Eggs
6 hardboiled eggs
1/4 cup total of Greek yogurt and mayonnaise mixed
1 tsp white wine vinegar
1 tsp yellow mustard
salt and pepper to taste
sprinkle with paprika to garnish

Directions
Cut hardboiled eggs lengthwise. With a spoon, gently scoop out yolks and place in bowl. Mix well with yogurt, mayonnaise, vinegar and mustard. Then refill egg whites with mixture.

Helpful tip: Do not set your filled eggs on serving platter until after you sprinkle them with paprika. Less messy.

For the Brussel Sprouts, we simply boiled them in salted water until tender. We let the flavor speak for itself.

Deviled Eggs and Brussel Sprouts Recipe2018-06-21T19:42:34-05:00
Go to Top